Showing posts with label Butter London. Show all posts

Saturday, December 17, 2011

Sparkle Saturday: Essence Edward

Happy Saturday, Lab Partners!


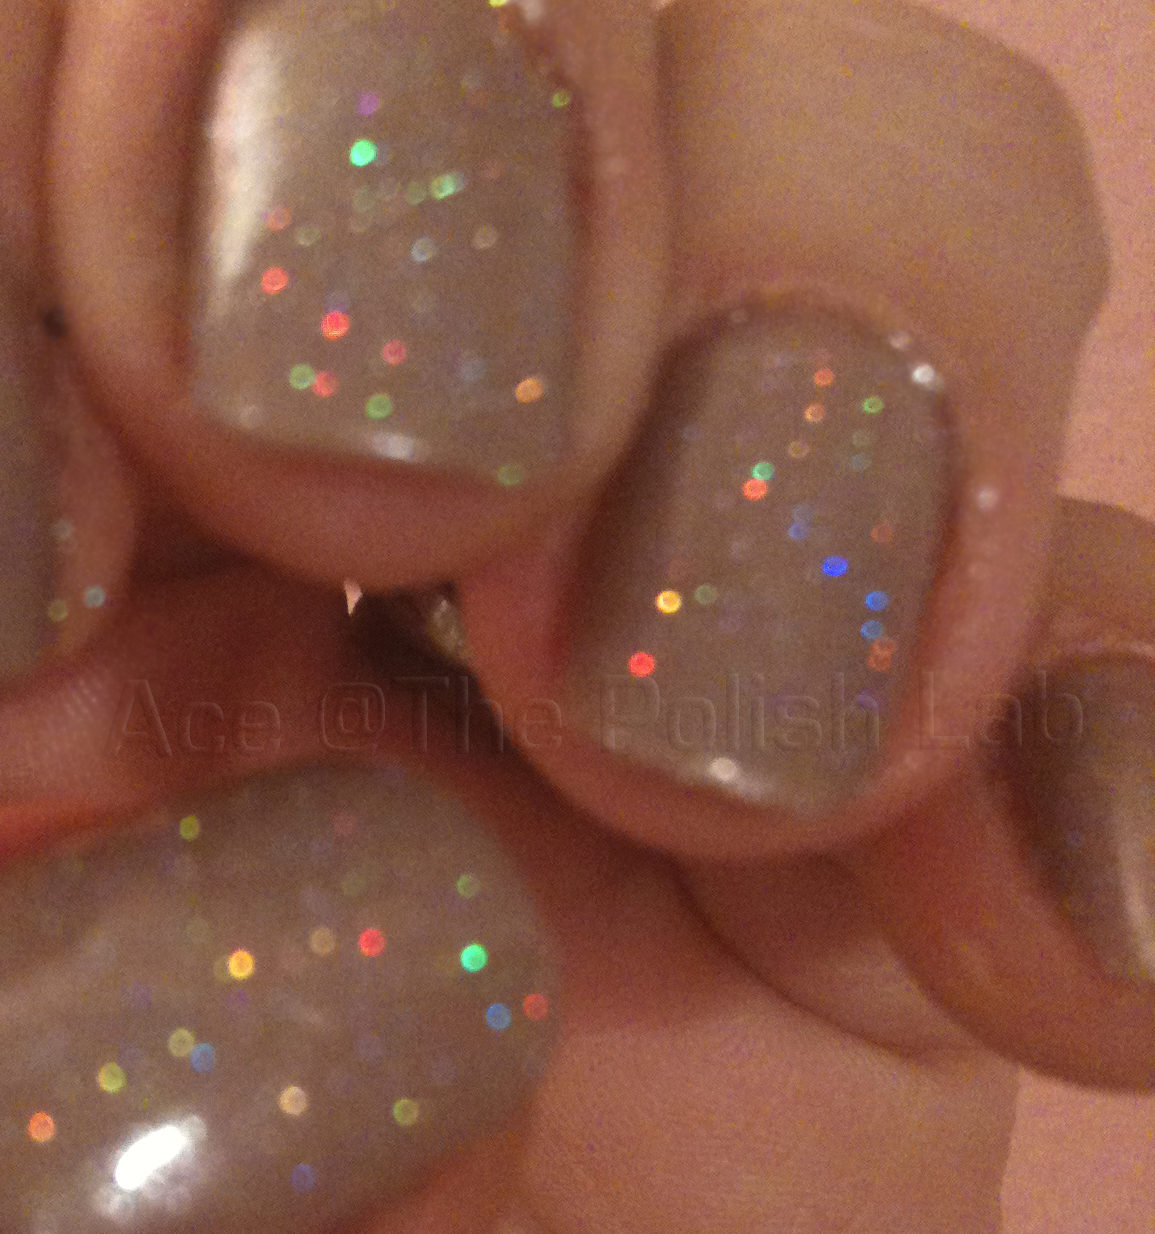
As you may remember from my post on Butter London's Tea with the Queen, it makes great underwear for showing off a glitter top coat, so here's Tea with the Queen again--only this time it's been embellished with Edward from the Essence Bella and Edward twin set. Although I love the look of Edward layered over Bella, wearing a nude polish as underwear certainly makes it easier to see Edward's square and smaller round teal and green glitter particles. And if you look closely, you might catch a holo microglitter or two.

Seeing this glitter on top of Tea with the Queen reminds me of--brace yourself--dragon eggs. Not that I've ever seen a dragon egg, but this is how I imagine them: peach with green glitter. A strange association, I know. But I'm always coming up with strange associations. Last night, I dreamed of a bracelet with a blackened purple stone, surrounded by bamboo. In my dream, I planned to fashion an entire accessory collection around the bracelet and call it Viet Nam Vamp. Obviously, someone's been watching too much Project Accessory!

So what do you think of dragon eggs aka Tea with Edward?

Hope you're having a lovely weekend. Incidentally, I'm out of town for the weekend, so my apologies if I'm unable to respond to your comments until I return home.

Until next time, sending you lab love,

Allison

Wednesday, December 14, 2011

Bench Work: Tea with the Queen

Hello Lab Partners,

For those of you who didn't see the answer to this weeks' Mystery Mani Monday, the polish was Finger Paints Vintage Velvet.

Now, to today's order of business . . . .

As you may recall, I'm on a perpetual search for a nude polish that doesn't make my hands look like death. Today, my quest continues with Butter London Tea with the Queen, a peachy nude.


"Tea" is about as close to my skin color as it gets, giving me somewhat of a "mannequin" hands look, which I like on some people, but usually not on me. Even though I feel my hands are somewhat invisible while wearing Tea, I don't dislike this polish. I like that it has enough peach to keep it from clashing with my skin, and if I were wanting to go with a natural look, this could very well be the polish I'd go with. In fact, because my nails tend to be stained from polish (you know how it is), I never wear clear polish, so this is as close to au naturel as I get. And the longer I wore this polish, the more I liked it! Tea would make a great base color for showing off a glitter top coat, so you can expect to see it as underwear for various glitters.

So what do you think of Tea with the Queen and my semi-mannequin hands?

Friday, December 9, 2011

Five Finger Friday: Warm Reds

Happy Friday, Lab Partners!

It's time for another 5FF, and given that it's the holiday season, I thought it might be a good time to look at some reds. Specifically, warm reds. In today's line-up: Butter London Old Blighty, No Miss Satsumo Salsa, RGB Coral, Zoya Tamsen, and Zoya Carrie Ann. You also get to see my broken nail on my index finger. :(


From L to R: Zoya Carrie Ann (on poor broken nail. Cry with me), Zoya Tamsen, RBG Coral, No Miss Satsumo Salsa
Starting with that broken index fingernail: Zoya Carrie Ann, a gorgeous, metallic one-coater. Yes, that's just one coat! Isn't it gorgeous?! Just on the warm side--not too orangey, for those of you who aren't into orange-reds.

Next, on the middle finger, one of my personal faves, Zoya Tamsen, a cream that applies super-smoothly. You're looking at two coats, but I could've gotten away with one. This warm red has a slightly brown undertone, making it lean toward brick red.

On the ring finger is RGB Coral. There's quite a bit of orange in this one (I love it). It's another super-smooth cream that could be a one-coater. I applied two coats.

On the pink finger is No Miss Satsumo Salsa. A word about No Miss: You can purchase these polishes on the No Miss web site. I buy mine at Whole Foods Market. No Miss is a Florida-based company, so all the polishes are named after cities here in the Sunshine State. I only own a couple of these puppies. My experience with Melbourne Mint (which I featured in another 5FF) was wonderful. It applied like a dream. But would Satsumo Salsa be as impressive? Well, you're looking at one coat. One, gloriously smooth, streak-free, shimmery coat. Actually, this polish is pinker than it appears in the bottle, so once seeing it on, I really wouldn't classify it as a warm red. But it applied so perfectly that I just had to share it with you!

On the thumb, I'm wearing Butter London Old Blightly, a distinctly brown-red. It has that vintage red look that reminds me of Amelia Earhart. Maybe that's a strange association, but there you have it. You're looking at two coats, but I could have gotten away with one. Something interesting about this polish--it applies very smoothly, yet a bit unevenly. It's not that the polish streaks or drags; it's more like the color pools a bit. It's nothing major, though, so don't let me scare you away from this polish. It's still wonderful!

So which is my favorite? Oh, that's a tough decision. I love them all. But I think I'm going to give the slight nod to my old standby, Tamsen. Maybe.

How 'bout you, readers? What are your thoughts on this group of polishes?


Friday, November 11, 2011

Five Finter Friday: Bronzes/Coppers

Happy Friday, Lab Partners!

Inside, artificial light


It's time for another 5FF! Today we'll take a look at some polishes in the bronze/copper family--quintessential fall polishes. For today's line-up I selected Julep Zoe, Zoya Jinx, Sephora by OPI Rumba Romance , butter  London The Old Bill, and e.l.f. Copper. A little note on The Old Bill: I sort of cheated with this one. I had another copper picked out to try, but I'd been curious about whether The Old Bill would lean towards bronze once applied, so I threw it in the mix. Did it, in fact, show bronze on the nail? Stay tuned, dear readers. Each one of these polishes is a metallic, my favorite finish. A brief aside: for some reason I'll never quite grasp, before I tried metallics I thought I wouldn't like them. What was I thinking?! Now, moving on to today's lineup, I give you coppers and bronzes:

Inside, artificial light

Inside, with flash
Pinkie: Zoya Jinx. This is one of my favorite polishes to wear on my toes. It's a true copper that applies beautifully and streak-free, providing opacity with one coat. However, I chose to apply a second coat.

On the ring finger: Sephora by OPI Rumba Romance. I was concerned on the first coat--this polish applied with a bit of streaking and was quite sheer. On the second coat, however, it was opaque, providing a smooth bronze finish.

The middle finger: Here's where I slipped in that "questionably" bronze polish. Would it appear bronze on the nail? Almost . . . but not quite. It's distinctly a dark champagne, which isn't usually my thing, but I actually like this one--as neutrals go. It's a little darker than many champagne polishes, and the fact that it's metallic makes it more appealing to me. It applied beautifully, and was nearly opaque in one streak-free coat and completely opaque in two.


On the pointer finger: e.l.f. Copper. Rebecca from Rebecca Likes Nails recommended this one. On the first coat, I was doubting her recommendation because it looked as if Copper would be too shear for my liking. But on the second coat, it was gorgeously opaque. Lesson learned--don't doubt Rebecca

Inside, with flash
 On the thumb: Julep Zoe. This is one of the polishes I received in my first Maven box three months ago. I knew by the looks of it that I'd love it, as long as it applied well. Fortunately, it applies beautifully--entirely streak-free and opaque in one coat, although I chose to apply a second coat. As you can see, there's quite a bit of orange to this one.


So there you have it! Honestly, I like this group better than I thought I would! These polishes blend color with neutrality, making them quite versatile for any season, but particularly appropriate for fall.

What do you think of these five colors? Which one is your favorite?


Until next time, sending you lab love,

Allison


Friday, October 21, 2011

Five Finger Friday: Gold-Greens

Hello Lab Partners!

Welcome to another Five Finger Friday (5FF)! Today, we're going to take a look at five different gold-greens, one of the hottest colors this fall. Before I introduce you to today's polishes, let me tell you that I adore each of them. I had never tried them before this, so I didn't know how I'd like them. Each applied like an absolute dream!


From left to right: Cult Nails In a Trance, Layla Magneffect Golden Nugget, CQ Golden Green, Butter London Wallis. Inside, with flash


Color Club Nouveau Vintage. Inside, no flash

On the pinkie, I applied Cult Nails In a Trance. I'd been dying to try this polish, and it definitely didn't disappoint. The darkest of the five, it's an olive green with gold shimmer. When the light hits it at just the right angle, as it did in the above photo, it appears more golden.

I applied Layla Magneffect in Golden Nugget on the ring finger. This was my first experience with my new magnetic polishes, but it certainly won't be my last! I love the effect it created, and it couldn't have been any easier! However, the name is misleading--this is more of a greenish grey. There's nothing golden about the color!

On the middle finger is CQ Golden Green, a lovely shimmer. This was my first time using a CQ polish (stores in my area don't carry them), and if this polish is any indicator of what CQs are like in general, I can't wait to try more!

Butter London Wallis is on the pointer finger. This polish is another I'd been dying to try, and like the others, it didn't disappoint.  Wallis is a metallic, with quite a bit of gold. It definitely catches the eye!

Finally, on the thumb I applied Color Club Nouveau Vintage, a multi-chromatic polish that looked far more golden-green in the bottle than it actually is. As you can see in the photo, it has quite a bit of red-based purple in it. I love it, but it's not as golden as I thought it would be.

Below are some additional shots taken in natural light. Cult Nails In a Trance is the one that appears most different in this light. It's less gold than it is in the indoor photo, where the light from the flash hits it directly. Here, the natural light is indirect, and In a Trance appears much greener, which is how it looks in most light.

From top to bottom: Wallis, Golden Green, Golden Nugget, In a Trance. Outside, natural light


Color Club Nouveau Vintage. Outside, natural light


I don't think I could choose a favorite from these polishes; I love each of them. How about you? What do you think of golden-greens?


Thursday, October 20, 2011

11 Week Challenge: Week 1 Mani

Hello Lab Partners!

We're participating in an eleven week mani challenge here at The Polish Lab. This week's challenge is to do a mani inspired by your favorite cause. I have several causes dear to my heart, and one of those happens to be The National Breast Cancer Foundation. Like many families, mine has a history of breast cancer, including a recent diagnosis of this disease in a male family member. As October is Breast Cancer Awareness Month, this was the perfect time to do something I rarely do: paint my nails pink. It's not that I don't like pink; it's just that it clashes with my red hair, so I don't wear it often. And yes, I realize it's neurotic to worry about my nails clashing with my hair.

I started my Week 1 Challenge Mani with a base color of Ulta Salon Formula Baby Doll, a very pale cream pink. I recently purchased several Ulta polishes, but I hadn't used any before trying Baby Doll. I've heard conflicting opinions on Ulta polish, so I was unsure what to expect. My experience with this polish can be summed up in a single word: YUCK. The first coat of Baby Doll applied unevenly, dragging on the nail and streaking. I hoped that the second coat would smooth out the unevenness and streaks, but it actually applied worse than the first coat! It dragged worse, tended to bubble, and left visible brush strokes. Credit for any evenness whatsoever goes to Posche top coat:

Ulta Salon Formula Baby Doll. Inside, artificial light. Unevenness, streaking, visible brush strokes
At this point, I faced a dilemma: did I want to go forward with the mani I had planned--a two-toned chevron French--or remove Baby Doll and go back to square one. I compromised: I went forward with my mani but with a change. I decided that a regular French tip combined with a bit of art across the nail might cover enough of the bubbles, brush stroaks, and uneveness for me to tolerate the Baby Doll base. So I sponged the tips with Color Club Poptastic, a neon pink, then applied Big Ruby nail tattoos to cover a bit more of that horrid base color. I adore Big Ruby tattoos. They couldn't be any easier to apply! They're a great way to spice up a mani quickly, without stamping or free-handing.

Tips sponged with Color Club Poptastic. Big Ruby Nail tattoos. Inside, artificial light

To further distract from the unevenness of Baby Doll, I applied a coat of Butter London Frilly Knickers, my absolute favorite micro-glitter. Frilly Knickers sounds like its name--its nothing if not girlie and delicate:

With addition of Butter London Frilly Knickers, Inside with flash

Overall, I'm not as dissatisfied with this mani as I feared I might be. I'm enjoying the pop of pink for a change, and the bright tips and lines draw my eye away from the many imperfections of Baby Doll.

If you'd like the join us in the 11 Week Challenge, please see our post containing more info, including a list of the weekly prompts. Feel free to post photos of your challenge manis on our FB page.

Until next time, sending lab love!

Allison

Thursday, September 29, 2011

Tag Team Thursday: Butter London Yummy Mummy

Hello Lab Partners! Both of us here at The Polish Lab rarely wear nude colors, but we agreed that we needed to add a few conservative colors to our stash, so we each decided to try Butter London's Yummy Mummy for the first time. Here's what we  found:

Allison: 

Butter London's Yummy Mummy is a beige polish, with subtle cool undertones. I usually avoid nude polishes because it makes me look washed out. My skin is light, but not porcelain. I typically wear bright, funky colors, and I receive the most compliments when I'm wearing vivid orange polish and lipstick. In other words, bold pops of warm colors work well with my skin tone. Needless to say, I was skeptical of  Butter London's claim that Yummy Mummy is "simply stunning on every skin tone," so I put it to the test.

Application of Yummy Mummy was nearly streak free, and the brush provided good control. This is a cream polish, with which I achieved opacity in two coats, but I added a third coat in an attempt to gain a bit more color. Did I find the color stunning on my skin tone? Unless by stunning you mean when wearing this polish, my nails--and by extension, my hands--seemed to disappear into some great void, then the answer is a resounding no. The color itself is a lovely neutral, appearing more of a neutral beige in some light, silver-pink beige in others. But it did nothing whatsoever for my hands other than give them a bland appearance. In other words, the polish is not blech! It's just blah. And in my book, blah is as bad as it gets. Usually, after painting my nails, my husband asks what color I'm wearing and compliments me.  I'm never certain he's complimenting the color because he genuinely likes it or because he feels some obligation to pay homage to the nails. In any case, when wearing Yummy Mummy, he didn't even notice I'd painted my nails. I'm not sure he even noticed I still had hands. I think Yummy Mummy would flatter darker skin tones much more than mine. For what it's worth, Yummy Mummy seems to look better on me in photos than it does in person.

Butter London Yummy Mummy. Inside, with flash.
Butter London Yummy Mummy. Outside, natural light.

A final thought (more of a quirky complaint, actually): although I like the appearance of Butter London's bottles, their rectangular shape makes it nearly impossible to roll in your hands, which is my preferred way to mix polish so that bubbles are less likely to occur.

Now, if you'll excuse me, I have to go take Yummy Mummy off my nails. If I can find them. I think I'll put on something bright. Really bright. With glitter. Oh, and if anyone is looking for a cool beige polish, it looks like I now have one available for trade.


Ace:

Now I will have little to add to Allison's review because the lab partners are pretty much in agreement! I tried Yummy Mummy before Allison and I did not tell her my opinion so we could reduce experimenter bias from the study (don't you love it when I get all sciencey?). So we each tried the polish independently and then see each others' comments. This is going to be continued in all Tag Team Thursdays.

OK, lets return to Yummy Mummy. Butter London is really confident about this color, putting "if you only get one, get this" in its description. It is supposed to be universally flattering. The nude to end all nudes. In this context, it is very natural to have high expectations.

I'll preface this by noting that I had just taken off the loveliness that is China Glaze Turned Up Turqoise when I put on Yummy Mummy. This may have "colored" my judgment about Yummy.

My first thought was, "This?" (<--- uttered in the same way Michael Bluth says "her?" about Egg, I mean Ann in Arrested Development for those of you who know this show).

My second thought was that the color sure isn't universally flattering. I thought it did not look that great with my skin tone. It looks too brown. I am your standard variety Caucasian with dark hair, fair skin, but currently with a tan. I think it looks better on Allison than on me.

I went on google and read reviews and most were very positive, echoing the Butter London blurb. So it seemed I was in the minority in not being to impressed with Yummy Mummy.

Pictures were taken on my phone so apologies, the quality is not great.

Yummy Mummy, indoors.


It did not take that long for me to get bored with Yummy Mummy so I added Northern Lights Silver Holographic Topcoat to it. In my view, this elevated the boring to kinda interesting in that ethereal sort of way.


Yummy Mummy with Northern Lights Holographic Top Coat.


Application was smooth and easy, no problems there. Can't comment on lasting power as I wore it for about 2 days.

I also have a complaint about the bottle. I actually thought they were really cute - I still do, visually speaking. But I had the same problem as Allison when I tried to roll them! Also when the polish is used up, you won't be able to eke out the last remaining bits because when you tilt the bottle to pool the polish up to use the last bit, the brush won't reach the corner. Tapered bottles like OPI and Zoya are the best in that sense. They're also not fitting sideways in my polish rack and thus take up a lot of space. It was overall a lesson in how design is not just about looks but also function.

Not that I will have to eke out the last drops from Yummy Mummy. My bottle is already on its way to an e-bay buyer. Overall, I thought Yummy Mummy was overrated. But it may please those looking for work-appropriate, subtle colors and those on whom the color works better. In my view it benefited greatly from the addition of Northern Lights.


Conclusion:

The Polish Lab partners agree. We found Butter London Yummy Mummy underwhelming. It may have a place in your collection if you need a nude with a slight bit of a twist, but we did not find the polish suited to our tastes. We are also skeptical that the color is flattering on all skin tones.

Let us know if you agree or disagree in the comments.


Tuesday, September 27, 2011

Easy Peasy Funky French Mani Tutorial

Hello Lab Partners!

In a previous post, I showed you swatches of various mint green polishes I have in my stash. Today, I'm going to show you how to do a super-easy funky French mani using one of those mint greens, Sinful Colors Mint Apple, as the base color. I know we have quite a few nail novices following our blog, so I wanted to create a tutorial appropriate for those who've never even thought of attempting any type of nail art or design. For those of you who are experienced nail polish-devotees, you'll want to take a look at these colors I used because I love how they look together.

You can choose whatever color combo you like. This is a great mani for showing of contrasting colors or colors within the same family. I chose colors within the green family: Sinful Colors Mint Apple and Sinful Colors Last Chance, plus a coat of  butter LONDON Frilly Knickers to add some sparkle.

L to R: Sinful Colors Mint Apple, Sinful Colors Last Chance, butter LONDON Frilly Knickers

Now, Let's get started! Personally, I like to coat the area around my nails with some balm. Here, I'm using Vaseline. If you're opposed to using petrolatum products, there are plenty of other balm-type products you can use, or you can choose to skip applying balm altogether. Next, we start on the nails. After creating a smooth foundation with a good base coat, paint your nails with a base color of your choice Always use thin coats to prevent bubbling, letting each coat dry several minutes before applying the next. How many coats you'll need will depend on the polish you use. You want an even, streak-free surface. Here's what my mani looked like after two coats of Sinful Colors Mint Apple:

Inside, artificial light

Outside


Next, you'll need to let your base color dry completely. Here's why: you're going to apply tape to your nails for the next step to achieve those straight edges for the angles tips. You didn't think I painted those tip free-hand, did you? I have enough trouble walking in a straight line! I use strips of regular Scotch tape--nothing fancy!. Before applying it to your nails, pat it several times on your hand or arm to get some of the stickiness off. You don't want the tape to be so sticky that it pulls off part of your base color. Once you've removed a bit of the stickiness from the tape, apply it at an angle on each nail of one hand. You can choose how sharp you'd like the angles, but I suggest avoiding too subtle an angle because you want the angle to look intentional, not like you were going for horizontal line that ended up tilted a bit. Trust me, I've made that mistake! Work one hand at a time because it's much easier than having tape on both hands at once. Here's what my hand looks like with the tape applied:


Next, you simply use your second color to paint your tips. You draw the polish right over the tape onto the tips of your nails. It's that simple! I used Sinful Colors Last Chance, a deep forest green, for the tips. I only needed one coat, but you might need two or even three coats to achieve opacity and evenness. Again, exercise patience here by letting each coat dry several minutes before applying the next. There are differing opinions on when to remove the tape. Some like their polish to be quite dry. I prefer to pull it off right away. You'll need to get in your lab and experiment to discover what gives you the best results. After pulling the tape off of one hand, let the polish dry thoroughly before taping and painting the nails on the other hand. Here's what my nails looked like after painting my tips:


At this point, you can apply a top coat and be done with your mani. But I wanted to add a bit of sparkle to this mani, so I applied 1 coat of butter LONDON Frilly Knickers, a very dainty sparkle polish. People often wonder whether this polish applies clear or white, as it looks milky white in the bottle. Just to see what would happen--that's what we like to do here at The Polish Lab--I swatched my thumb nail with three coats of Frilly Knickers. You can see from the photo below that it does become a bit milky after three coats, but it's still mostly translucent.

butter LONDON Frilly Knickers, 3 coats


For this mani, however, I applied a single coat, and it contributed no milkiness whatsoever, simply a delicate glitter I adore. Here's the end result:

Outside

I wish this photo captured the sparkle better, but that's a glitter for you--they can be difficult to capture in photos. Trust me, when these little glitter pieces catch the sunlight, they're gorgeous! This is one of those manis that kept me looking at my hands!

So there you have it. That was easy!

Until next time, sending lots of lab love your way,

Allison